
Hi Everyone, I am melting! it’s official. Not only are people from the UK obsessed with the weather, a true stereotype in this case, but also we never get hot weather so the aircon is few and far between! Anyway, good excuse to eat icecream? I think so. lol. Or maybe, Cookies and Icecream??? 😉 Cool link to my new Cookie Class? 😉
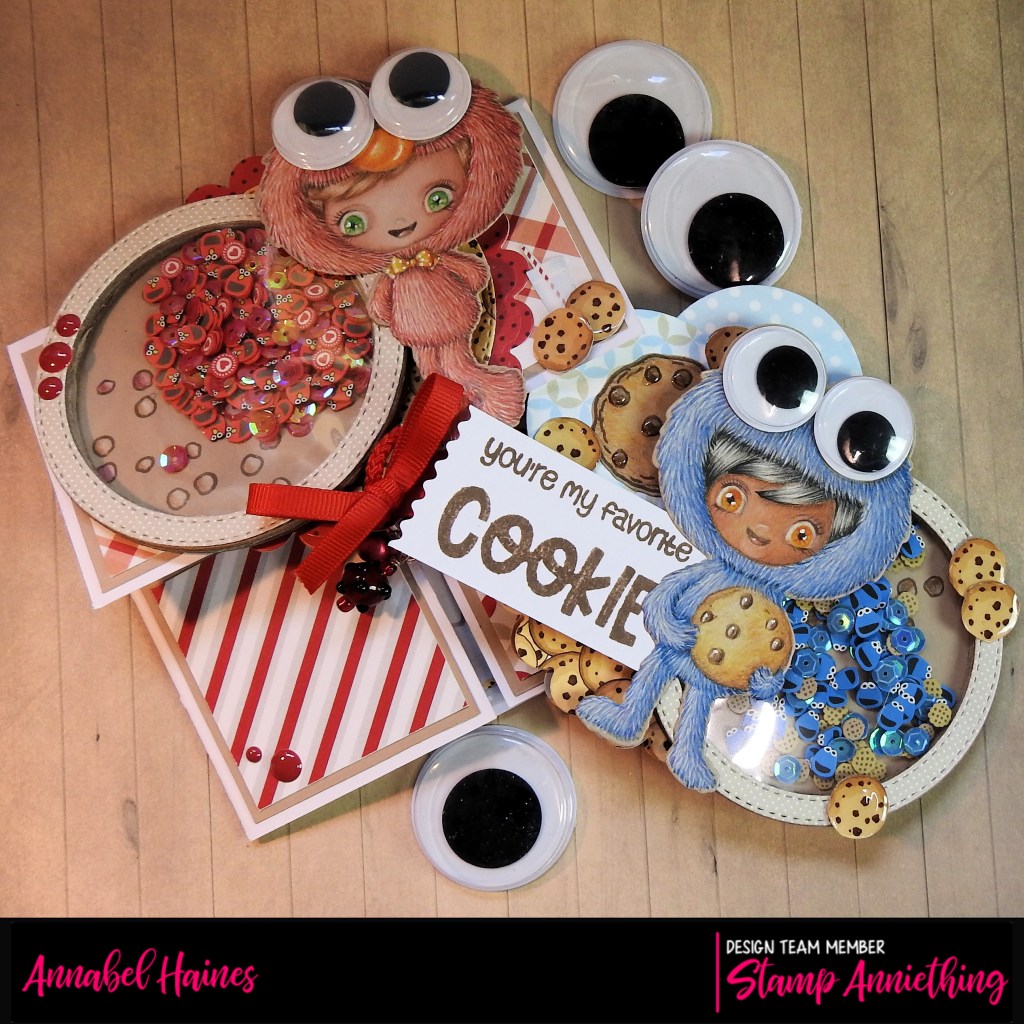
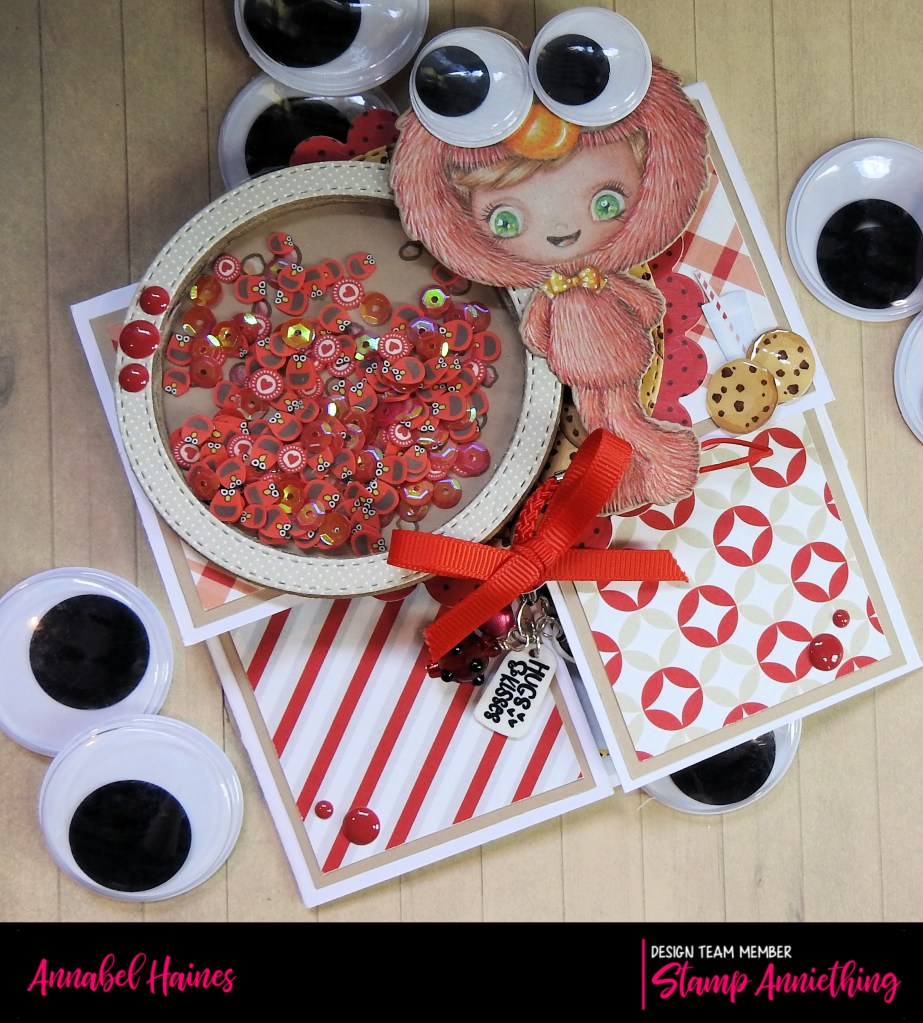
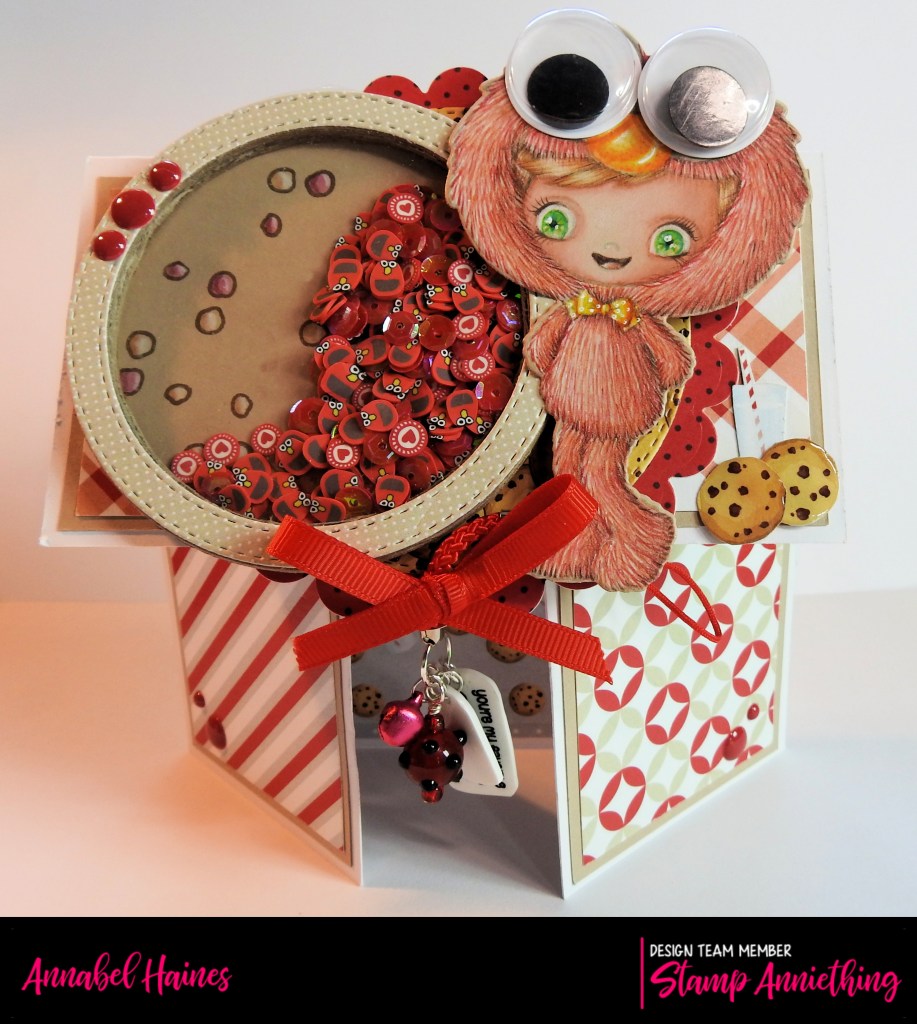
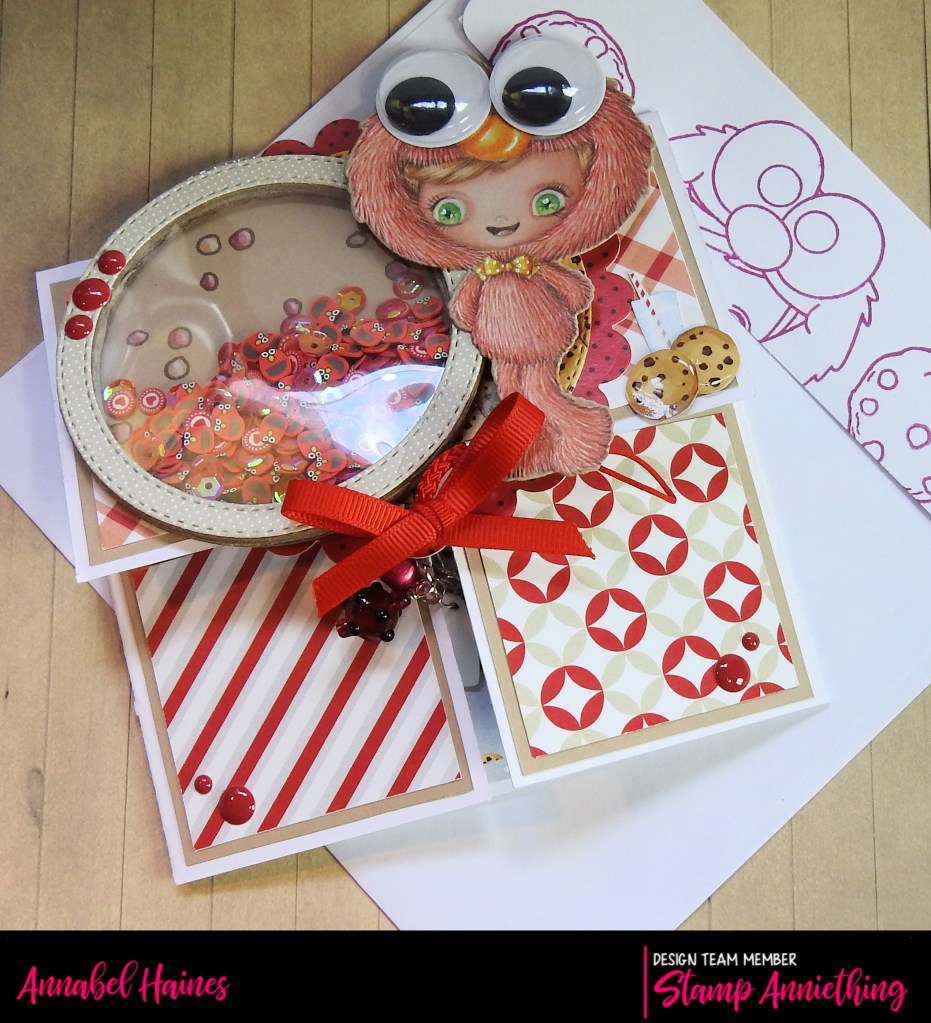
Thought I would share a few photos of Elmo, using all the kit from the C is for Cookie Color Youniversity class.
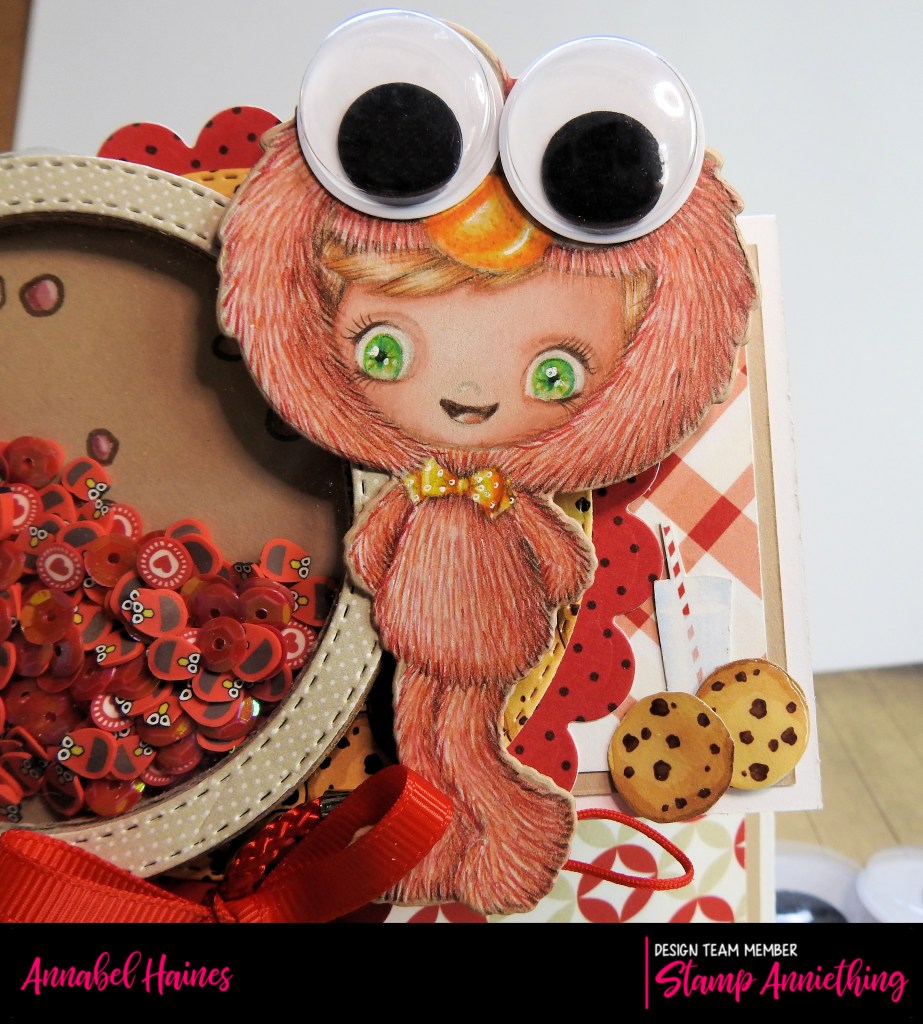
So perhaps the most important part of this class is fur colouring with pencils. I use polychromo pencils for the demo, but this technique works pretty well with other brands too.
Below is a close up of the fur we do for Elmo. This is the standard layers of fur btw, you can build up the layers even more if you want to spend more time on it! The course lasts about 5 hours tho, I thought that was long enough, lol!
I used the tin of 24 polychromo pencils and one extra called beige red, number 132. I also used a small plastic pencil sharpener, just the cheap normal kind, polychromos don’t work well with electric pencil sharpeners, and expensive ones are a waste, polys will break them!! I also use a floofer for clearing off the pencil dust, and I recommend getting an electric rubber too. I use it for cleaning up all my edges, and quite a few techniques (not covered in the course) so I think it’s a good buy if you are going to dabble more with pencils.
Want to know a bit about how a Color Youniversity Class works? Well, what happens is that the class goes on sale a few weeks before the course date, which in this case, is 7th Aug. Very promptly after you have enrolled you get sent the course pack! It contains all the special products for the course, and plenty of extra’s for using the kit for your own projects afterwards.
You get a lot of details on the listing for the course – HERE and then before the event you get some more info by email that tells you everything you might need for the course that wasn’t in the pack you were sent, like scissors, tape, craft knife, etc. Mainly craft room basics, nothing fancy!
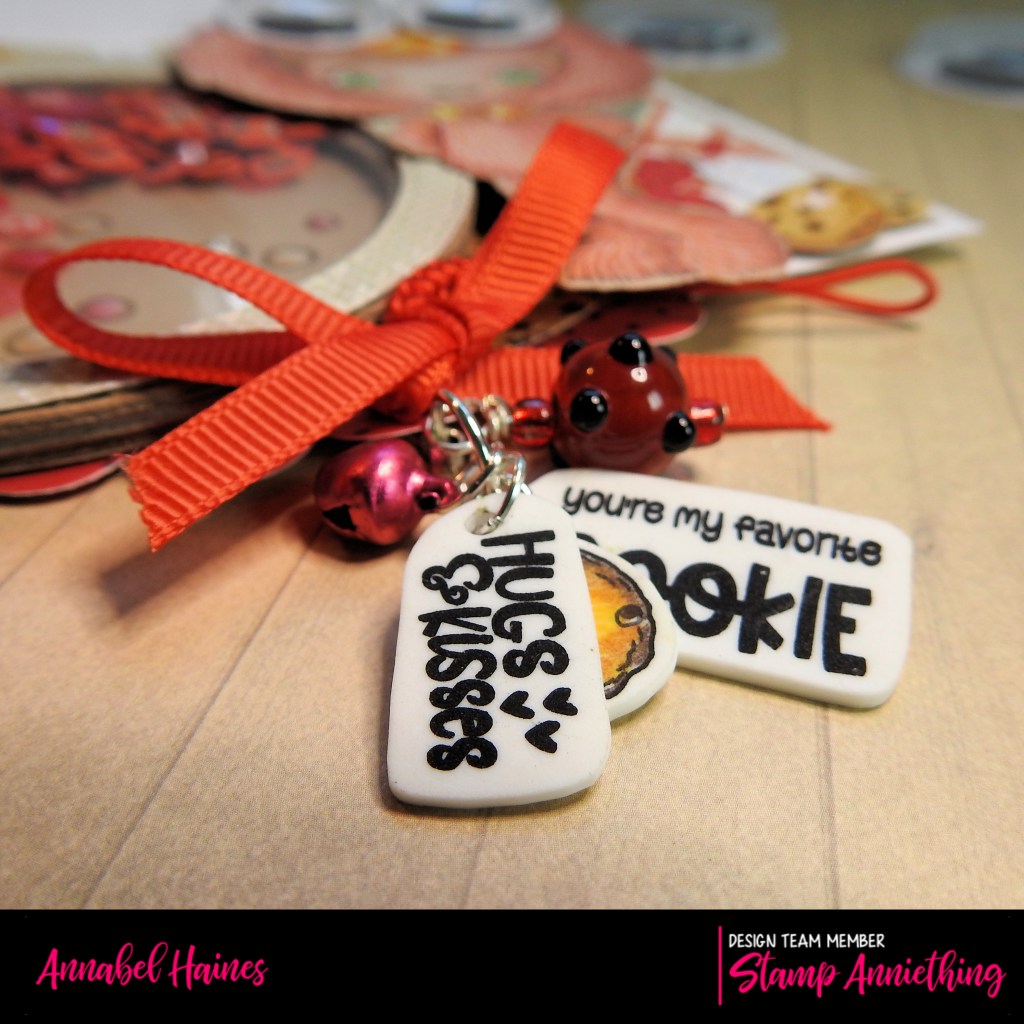
We also use shrinkies to make a cute charm that goes with our card projects! Everything to make the charm is in the pack, but you can add your own beads and charms if you like? I used some smooth nosed jewellery pliers to open the metal jump rings, makes life easier if you have some?
I am excited to say this method of making a shaker is practically fool proof! I am not a shaker queen, so I need this kind of help! I recommend the Shaker Basics Dies, I used the Shaker Basics Set 1 to make my project, but you can swap it for another circle die in your stash, no prob. The Elmo sprinkles are included in the kit, I mixed them up with some red sequins from my stash and the circle red heart sprinkles too.
I took this photo so you can see how the “dutch fold” or “house fold” works. You get a template for this when you sign up for the course, it’s super easy to construct, and maybe a fold you haven’t used much before?
You can choose whether to add the wobbly eyes, or make the glossy accent cookie embellishments, so remember you can miss out any part of the process you don’t fancy, no-one would tell you off! You can also re-watch parts, or if you can’t make the course day, watch them later, I will be fine to answer questions after the official event!
Thanks for coming to look at this post, you can always ask me questions about the course, I never mind chatting about crafting stuff! Everyone at Stamp Anniething is also always happy to answer questions too! We are nice folk, you know? Weird but nice 😉 x

